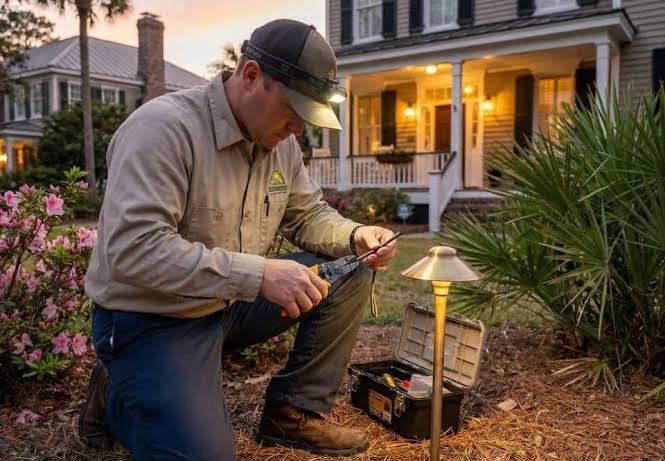
Outdoor lighting adds beauty, safety, and security to your home, but the fixtures and wiring are exposed to weather, pests, and general wear. When your landscape lights stop working, knowing how to diagnose and fix common problems can save you money and restore your outdoor illumination. Here is a guide to outdoor lighting repair for common issues.
Outdoor lighting repair costs $50 to $300 for most common problems. DIY repairs cost $5 to $50 for replacement parts. The most common issues include burnt-out bulbs, damaged wiring, faulty transformers, and corroded fixtures that need replacement or cleaning to restore proper function.
Burnt-Out Bulb Replacement
The most common outdoor lighting repair is replacing burnt-out bulbs. Outdoor bulbs burn out faster than indoor bulbs because of exposure to temperature changes, moisture, and vibration from wind. LED bulbs last significantly longer than halogen or incandescent bulbs in outdoor applications and are worth the higher initial cost.
Replacing an outdoor light bulb costs $3 to $20 for the bulb itself. LED bulbs cost more upfront but last 25,000 to 50,000 hours compared to 2,000 to 5,000 hours for halogen bulbs. The labor cost is $25 to $75 if you hire a professional. Most homeowners can replace outdoor bulbs themselves with a ladder and basic tools from the hardware store.
When replacing outdoor bulbs, check the fixture for corrosion or damage. Clean the fixture socket with a wire brush if there is corrosion. Apply dielectric grease to the bulb base before installing the new bulb to prevent future corrosion and extend the bulb life in the outdoor environment.
Wiring Problems and Fixes
Damaged wiring is a common problem in outdoor lighting systems, especially in landscapes with underground wiring. Wires can be damaged by digging, rodents, or weather exposure. A break in the wire causes all fixtures downstream from the break to stop working. Finding and fixing the break restores power to the affected lights.
Low-voltage landscape lighting uses a transformer to convert household current to 12 or 24 volts. The wiring runs from the transformer to each light fixture. Wiring repairs cost $75 to $200 for a professional. DIY wiring repair costs $10 to $30 for connectors, wire, and waterproof splice kits from the hardware store.
To find a wiring break, check the voltage at each fixture using a multimeter. Start at the transformer and work your way down the line. When the voltage drops to zero, you have found the break location. Dig up the wire at that point, repair the break with a waterproof connector, and bury the wire back in the ground.
Transformer Problems
The transformer is the heart of a low-voltage lighting system. If multiple lights are out or flickering, the transformer may be the problem. Transformers can fail due to age, power surges, or overloading. A transformer replacement costs $50 to $200 for the part and $100 to $250 for professional installation.
Check the transformer by looking at the indicator light. If the light is off, the transformer is not receiving power. Check the circuit breaker and GFCI outlet that powers the transformer. If the indicator light is on but the lights are not working, the transformer may be damaged and needs replacement for the system to function properly.
Overloading the transformer is a common cause of failure. Each transformer has a maximum wattage rating. Add up the wattage of all fixtures connected to the transformer. If the total exceeds 80 percent of the transformer rating, the transformer is overloaded and may fail prematurely. Remove some fixtures or upgrade to a higher-capacity transformer for the system.
- Check circuit breaker and GFCI outlet first – free
- Test transformer output voltage with multimeter – free
- Check for overloaded circuits – free diagnosis
- Replace transformer if faulty – $50 to $200 for part
- Upgrade to larger transformer if overloaded – $75 to $300
Fixture Corrosion and Damage
Outdoor light fixtures are exposed to rain, snow, sun, and temperature changes that cause corrosion over time. Corroded fixtures may stop working, flicker, or produce dim light. Replacing corroded fixtures restores proper lighting and improves the appearance of your landscape at night.
Fixtures made from brass, copper, or stainless steel resist corrosion better than aluminum or plastic fixtures. The initial cost is higher, but the fixtures last longer and require less maintenance. Replace corroded fixtures with corrosion-resistant materials for the best long-term results in your outdoor space.
An outdoor lighting specialist with 15 years of experience said: “The most common problem I see is homeowners installing standard indoor fixtures outdoors. Indoor fixtures are not sealed against moisture and fail within months when exposed to weather. Always use fixtures rated for outdoor use. Look for the UL wet location or damp location rating on the fixture label before installation.”
Frequently Asked Questions
How much does outdoor lighting repair cost?
DIY repair costs $5 to $50 for parts. Professional repair costs $50 to $300. The cost depends on the problem type and whether the fixture needs replacement or just a bulb.
Why are some of my outdoor lights not working?
Common causes are burnt-out bulbs, damaged wiring, faul. Start by checking the bulbs and the circuit breaker for the lighting system.
Can I repair outdoor lighting myself?
Yes, basic repairs like bulb replacement and wiring con. Transformer replacement and trenching for underground wiring are better left to a professional electrician.
Should I upgrade my outdoor lights to LED?
Yes, LED bulbs last 10 times longer than halogen and us. The higher bulb cost is offset by longer life and lower electricity bills over time.
How do I know if my transformer is bad?
If multiple lights are out or flickering, the transform. Check the indicator light and test the output voltage with a multimeter to diagnose the problem accurately.
How deep should outdoor lighting wire be buried?
Low-voltage lighting wire should be buried at least 6 i. Use PVC conduit for protection in areas where digging may occur. Wire rated for direct burial is required by code.
Can I save money by repairing outdoor lights myself?
Yes, DIY bulb replacement saves $25 to $75 in labor. DIY wiring repair saves $75 to $200. Only attempt DIY repairs if you are comfortable working with low-voltage electrical systems.
How do I prevent outdoor lighting problems?
Use outdoor-rated fixtures and bulbs. Apply dielectric grease to bulb connections. Check fixtures annually for corrosion. Trim vegetation away from lights to prevent moisture buildup and damage.
Frequently Asked Questions
How much does outdoor lighting repair cost?
DIY repair costs $5 to $50 for parts. Professional repair costs $50 to $300. The cost depends on the problem type and whether the fixture needs replacement or just a bulb.
Why are some of my outdoor lights not working?
Common causes are burnt-out bulbs, damaged wiring, faul. Start by checking the bulbs and the circuit breaker for the lighting system.
Can I repair outdoor lighting myself?
Yes, basic repairs like bulb replacement and wiring con. Transformer replacement and trenching for underground wiring are better left to a professional electrician.
Should I upgrade my outdoor lights to LED?
Yes, LED bulbs last 10 times longer than halogen and us. The higher bulb cost is offset by longer life and lower electricity bills over time.
How do I know if my transformer is bad?
If multiple lights are out or flickering, the transform. Check the indicator light and test the output voltage with a multimeter to diagnose the problem accurately.
How deep should outdoor lighting wire be buried?
Low-voltage lighting wire should be buried at least 6 i. Use PVC conduit for protection in areas where digging may occur. Wire rated for direct burial is required by code.
Can I save money by repairing outdoor lights myself?
Yes, DIY bulb replacement saves $25 to $75 in labor. DIY wiring repair saves $75 to $200. Only attempt DIY repairs if you are comfortable working with low-voltage electrical systems.
How do I prevent outdoor lighting problems?
Use outdoor-rated fixtures and bulbs. Apply dielectric grease to bulb connections. Check fixtures annually for corrosion. Trim vegetation away from lights to prevent moisture buildup and damage.
Quality materials and proper installation ensure the best results for your home improvement project. Investing in professional work saves time and prevents costly mistakes in the long run.
Quality materials and proper installation ensure the best results for your home improvement project. Investing in professional work saves time and prevents costly mistakes in the long run.
Quality materials and proper installation ensure the best results for your home improvement project. Investing in professional work saves time and prevents costly mistakes in the long run.
Quality materials and proper installation ensure the best results for your home improvement project. Investing in professional work saves time and prevents costly mistakes in the long run.
Quality materials and proper installation ensure the best results for your home improvement project. Investing in professional work saves time and prevents costly mistakes in the long run.
Quality materials and proper installation ensure the best results for your home improvement project. Investing in professional work saves time and prevents costly mistakes in the long run.
Quality materials and proper installation ensure the best results for your home improvement project. Investing in professional work saves time and prevents costly mistakes in the long run.
Taking the time to research your options very thoroughly and choose the best quality materials makes a significant difference in the final outcome. Professional installation ensures the best results and longest lifespan for your investment. Compare multiple quotes and check references before hiring a contractor for the work on your property.
Taking the time to research your options very thoroughly and choose the best quality materials makes a significant difference in the final outcome. Professional installation ensures the best results and longest lifespan for your investment. Compare multiple quotes and check references before hiring a contractor for the work on your property.
Taking the time to research your options very thoroughly and choose the best quality materials makes a significant difference in the final outcome. Professional installation ensures the best results and longest lifespan for your investment. Compare multiple quotes and check references before hiring a contractor for the work on your property.
This information helps you make informed decisions about your home improvement project and choose the right solution for your specific needs and budget constraints.