Resistance bands are versatile, portable, and highly effective tools for strength training and rehabilitation. Whether you’re working out at home, traveling, or at the gym, resistance bands can provide an effective full-body workout. But to maximize their potential, it’s essential to understand how to use a door anchor with resistance bands.
This guide will walk you through everything you need to know about using a door anchor safely and effectively, including step-by-step instructions, tips for setup, and exercises you can try today.
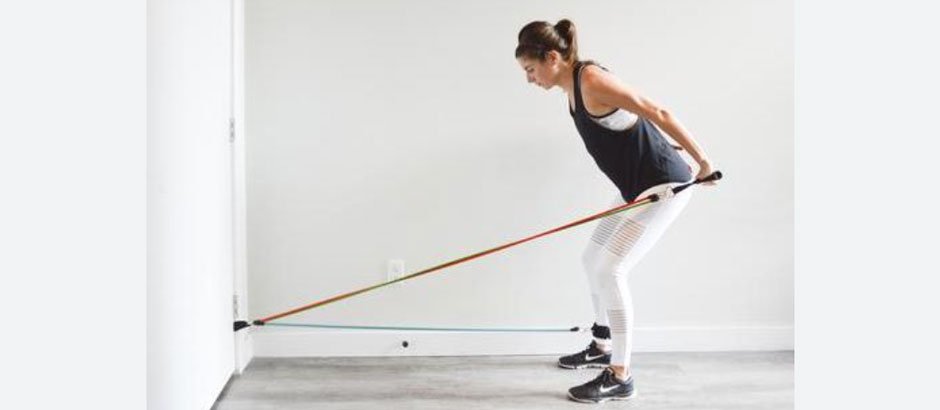
What Is a Door Anchor?
A door anchor is a small accessory that allows you to attach your resistance bands securely to a door. It typically consists of a strap with a foam or rubber stopper at one end and a loop for attaching resistance bands at the other. The stopper is wedged between the door and its frame, while the loop remains accessible for your workout.
Why Use a Door Anchor?
Using a door anchor expands the range of exercises you can perform with resistance bands by creating a stable anchor point at different heights. Benefits include:
- Versatility: Perform horizontal, vertical, or diagonal movements for a full-body workout.
- Adjustability: Target specific muscle groups by changing the anchor’s position on the door.
- Convenience: No need for bulky equipment; a door anchor and resistance bands are all you need.
- Portability: Great for workouts at home, in hotels, or anywhere you have access to a sturdy door.
How to Set Up a Door Anchor with Resistance Bands
Before diving into exercises, it’s crucial to set up your door anchor correctly to ensure safety and effectiveness. Follow these step-by-step instructions:
1.Choose the Right Door
- Select a sturdy, solid door that can support the tension from your workout.
- Ensure the door closes securely, preferably toward you, to prevent it from opening during exercises.
2.Position the Door Anchor
- Open the door and place the foam or rubber stopper on the side opposite to where you will be exercising.
- Position the anchor at your desired height (top, middle, or bottom of the door) depending on the exercise you plan to perform.
- Top: For overhead movements like lat pulldowns.
- Middle: For horizontal movements like rows.
- Bottom: For lower body exercises like leg curls.
3.Secure the Door Anchor
- Close the door firmly, ensuring the stopper is wedged tightly between the door and frame.
- Test the setup by gently pulling on the anchor to ensure it’s secure.
4.Attach the Resistance Bands
- Thread the resistance band through the loop of the door anchor.
- Make sure the band is evenly centered to avoid uneven tension.
5.Check for Safety
- Inspect the resistance bands for any signs of wear or tear before starting.
- Test the setup by pulling lightly on the band to ensure the anchor and band are secure.
How to Use a Door Anchor with Resistance Bands: Step-by-Step Exercises
Once your door anchor is set up, you’re ready to perform a variety of exercises targeting different muscle groups. Below are step-by-step instructions for some popular exercises.
1.Lat Pulldowns (Upper Back)
- Anchor Height: Top of the door.
- Setup: Attach the resistance band to the door anchor and hold each handle.
- Execution:
- Stand facing the door with your arms extended upward.
- Pull the handles down toward your chest while squeezing your shoulder blades together.
- Slowly return to the starting position.
- Repetitions: Perform 10–12 reps for 3 sets.
2.Chest Press (Chest and Shoulders)
- Anchor Height: Middle of the door.
- Setup: Face away from the door with the band handles in each hand.
- Execution:
- Step forward to create tension in the band.
- Push the handles forward until your arms are fully extended.
- Slowly return to the starting position.
- Repetitions: Perform 10–12 reps for 3 sets.
3.Standing Rows (Back and Biceps)
- Anchor Height: Middle of the door.
- Setup: Face the door and hold each handle with palms facing inward.
- Execution:
- Pull the handles toward your torso, keeping your elbows close to your body.
- Squeeze your shoulder blades together at the end of the movement.
- Slowly return to the starting position.
- Repetitions: Perform 10–12 reps for 3 sets.
4.Tricep Pushdowns (Triceps)
- Anchor Height: Top of the door.
- Setup: Face the door and hold each handle with palms facing downward.
- Execution:
- Keep your elbows close to your body and push the handles down until your arms are fully extended.
- Slowly return to the starting position.
- Repetitions: Perform 10–12 reps for 3 sets.
5.Bicep Curls (Biceps)
- Anchor Height: Bottom of the door.
- Setup: Face the door and hold each handle with palms facing upward.
- Execution:
- Curl the handles toward your shoulders, keeping your elbows stationary.
- Slowly return to the starting position.
- Repetitions: Perform 10–12 reps for 3 sets.
6.Leg Kickbacks (Glutes and Hamstrings)
- Anchor Height: Bottom of the door.
- Setup: Attach the band to an ankle strap (if available) and face the door.
- Execution:
- Extend your leg straight back, keeping your core engaged.
- Slowly return to the starting position.
- Repetitions: Perform 10–12 reps per leg for 3 sets.
Tips for Using a Door Anchor Safely
To ensure a safe and effective workout, keep the following tips in mind:
- Inspect Your Equipment Regularly
- Check your resistance bands and door anchor for signs of wear or damage before each use.
- Replace any damaged equipment immediately.
- Choose the Right Resistance Level
- Start with a lighter resistance band if you’re a beginner, and gradually increase the tension as you build strength.
- Maintain Proper Form
- Focus on controlled movements and avoid jerking or snapping the band to prevent injury.
- Engage your core and maintain proper posture throughout each exercise.
- Avoid Overloading the Door
- Don’t use excessive force that might damage the door or compromise its stability.
- Test the Anchor Before Starting
- Always give the door anchor and resistance bands a gentle pull to ensure everything is secure.
Benefits of Using Resistance Bands with a Door Anchor
Incorporating a door anchor into your resistance band workouts offers numerous benefits:
- Full-Body Workouts: Target every muscle group with a variety of exercises.
- Customizable Resistance: Adjust the band’s resistance level to suit your fitness goals.
- Compact and Portable: Great for small spaces or travel.
- Joint-Friendly: Provides smooth and controlled resistance, reducing the risk of injury.
- Cost-Effective: An affordable alternative to bulky gym equipment.
Frequently Asked Questions
1.Can I Use Any Door for a Door Anchor?
While most doors are suitable, it’s important to choose a sturdy door that closes securely and can handle the tension of your workout.
2.How Do I Prevent the Door from Opening During Exercises?
For maximum safety, use a door that closes toward you so that the resistance from the bands reinforces the closure.
3.Are Resistance Bands with a Door Anchor Suitable for Beginners?
Yes! Resistance bands with a door anchor are beginner-friendly, allowing you to start with light resistance and progress at your own pace.
Conclusion
Learning how to use a door anchor with resistance bands can elevate your workout routine by providing endless possibilities for strength training and rehabilitation. By following the setup steps, safety tips, and exercise instructions outlined in this guide, you’ll be well on your way to achieving your fitness goals.
Start incorporating door-anchor exercises into your routine today and experience the versatility and effectiveness of resistance bands. With just a door anchor and a set of resistance bands, you can transform any space into a personal fitness studio.


